Using the SHA, long version
Simplest Search
1. Go to the SHA: http://irsa.ipac.caltech.edu/applications/Spitzer/SHA/
2. Click on "Search the Heritage Archive."
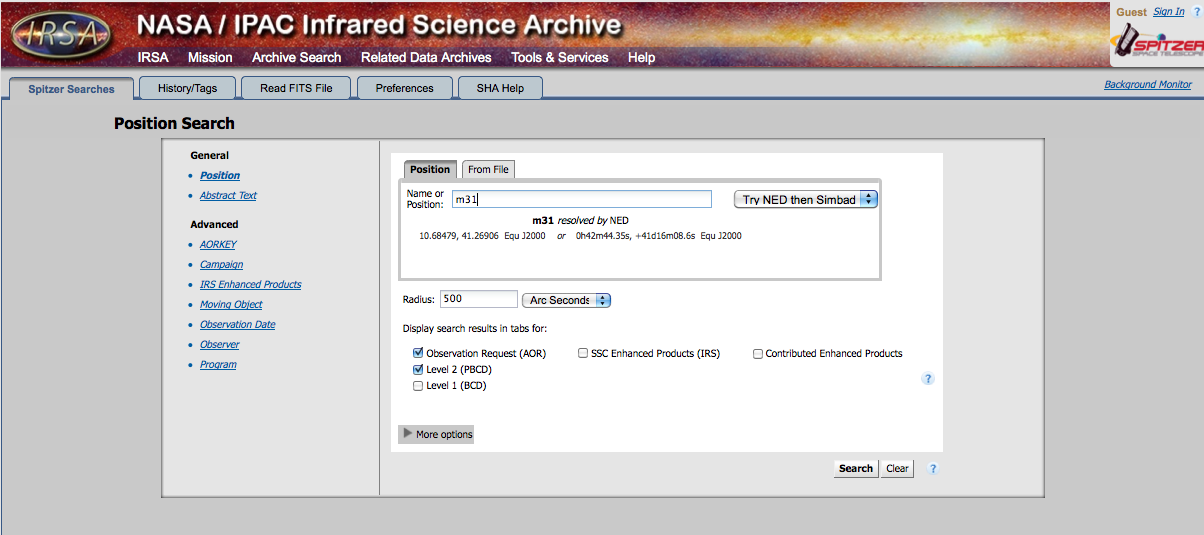
3. You are dropped into a "postion search." (There are other search options on the left.) Type in the name of an object you care about. The machine will automatically resolve the name, e.g., turn the name into coordinates. You can choose which service does this name resolution - NED or SIMBAD. If you have something extragalactic, NED is better; if you have something else, SIMBAD works better.
4. Now, you can just hit search.
Refining your search
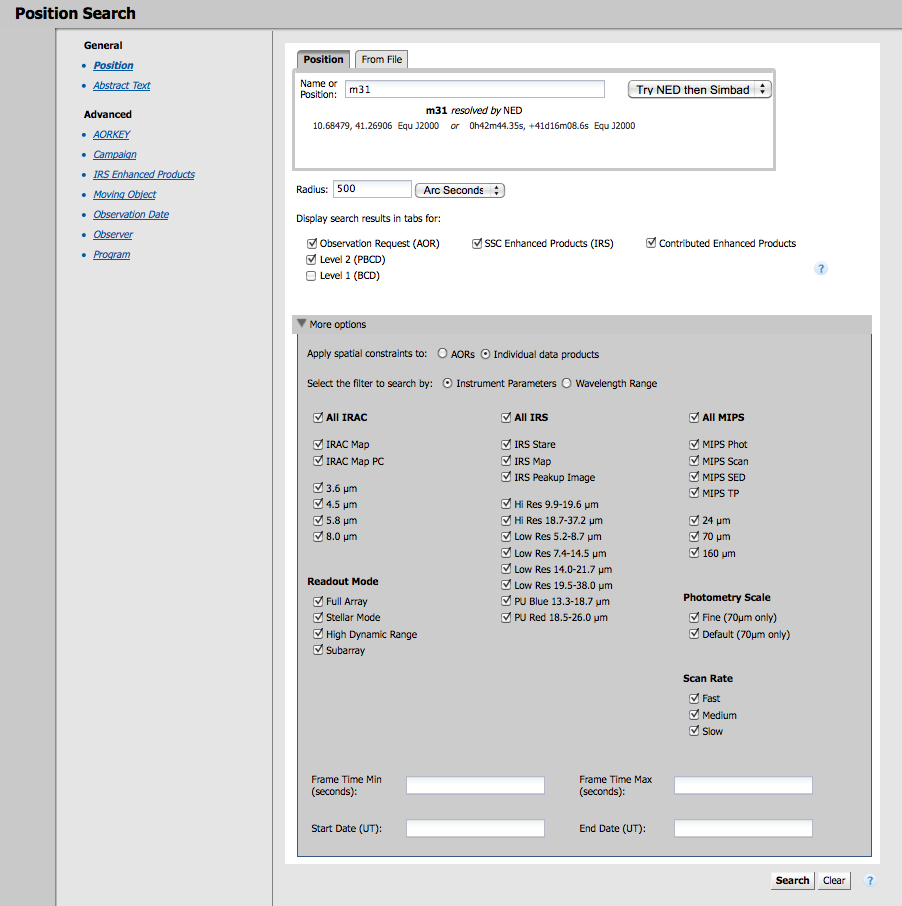
5. Maybe you want to customize things further. The additional options, as seen in the box above, are:
- search radius -- change the units, type in the number you want.
- apply spatial constraints -- do you want it to return whole AORs, or just the region within your search radius?
- display search results -- which data products do you want? That's important. Let me repeat that, in bold: which data products do you want? Look above, under "Basic Terminology." In all liklihood, you want the AORs and the Level 2 (post-BCD) data. In my picture above, I also have Level 1 (BCD) checked, but that's me. :)
6. Now, again, even from here, it's just fine to hit search. BUT, maybe you want to customize things even further! Click on the little "More options" line to reveal, well, more options:
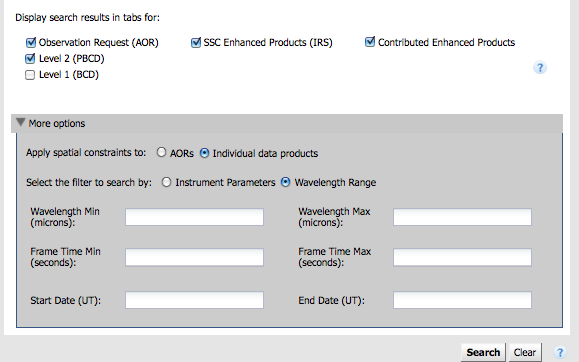
7. Maybe you are only interested in IRAC data? Or just MIPS-24 data? Pick which you want. The default is to return everything. If you want to, e.g., turn off all IRS search results, click on the checkbox next to "All IRS." (And similarly for the other instruments.) If you want to search by wavelength instead (maybe you don't remember which channel is which on IRAC), you can also search by wavelength:
8. NOW, click "search."
Understanding your results -- the anatomy of the search results page
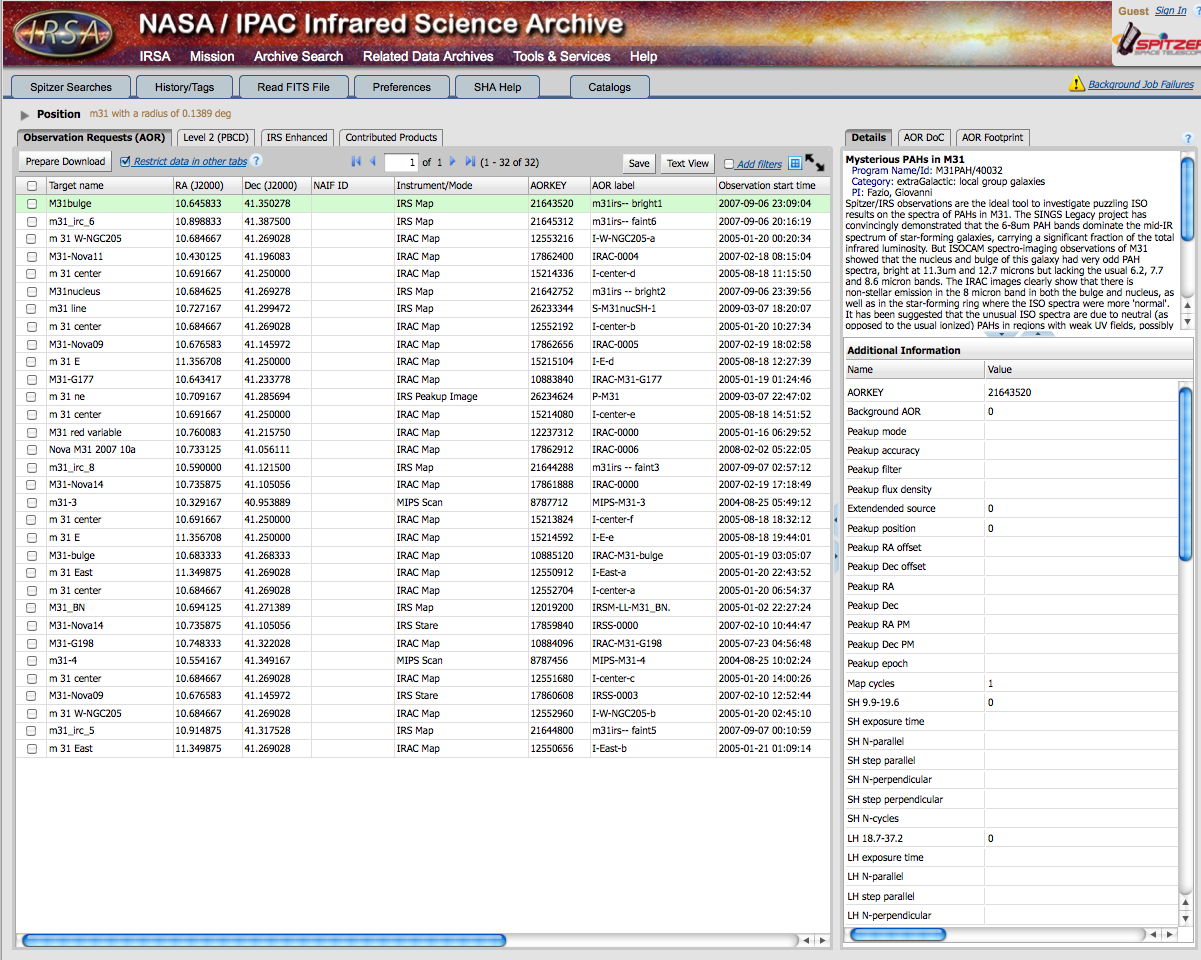
This is what I see after a generic search for all M31 data:
Let's examine the anatomy of this page.
The online help is on the top right, at the end of the red menu bar. Pick 'Spitzer help' for the right help. There's an option there for K-12 teachers and NITARP, but right now it just points back to our pages about NITARP, not more information specifically targeted at you guys. Sorry!
The yellow bar is your (collapsed) search pane. To search again, click on it, and it will expand.
The main part of this window is your search results.
On the left there are individual itemized results. On the right is the "Details Pane", the contents of which changes according to what you have selected in the individual itemized results. There are several tabs here too, and again, these tabs change depending on what you are looking at in the itemized results.
On the left are three tabs in my example, but the number and content of tabs corresponds to what you have selected for your download. Here are my three tabs:
I have tabs that read: "Observation Requests (AOR)" (AORs are Astronomical Observation Requests, e.g. the fundamental unit of Spitzer observing), "Level 2 (PBCD)" (PBCD=Post-Basic Data Products -- products that come from combining individual frames, e.g., mosaics), and "Level 1 (BCD)" (BCD= Basic Data Products -- individual frames from the observations).
As NITARP users, your first stop should be the AOR tab, because this is a high-level summary of the observations. After you pick which observations you want, then you want the Level 2 tab to get the mosaics (and associated files). Even professional astronomers should start with the AOR tab. Because each AOR can result in hundreds, sometimes thousands, of files, this AOR tab really is the best place to start browsing!
Column Headings in the AOR window are:
- The target name was supplied by the original observer and may be clear or it may be cryptic.
- The RA and Dec are the target of the AOR as observed.
- If the object was observed as a moving target, the NAIF ID is listed; otherwise, this is blank.
- The instrument and observing mode are listed next.
- The AORKEY is a large integer that uniquely identifies this observation in the SHA.
- The AOR label was supplied by the original observer and may be clear or it may be cryptic.
- The Observation start time is the time, in UT, that the observation was begun.
- The Program ID is the integer identifier for the program under which these observations were obtained.
- The Principal Investigator (PI) for these data is listed last in the default display.
- An additional column can be added which indicates whether the observation was an AOR or an IER. (click on the little grid-like button at the top right of the tab window to do this.)
Restricting data in other tabs: By default, the search results come up with all returned AORs in the AOR tab and all corresponding files -- and there are many -- for ALL of the AORs in the other tabs (Level 1 and Level 2). If you want to limit exactly which files appear in the Level 1 and Level 2 tabs, check the "Restrict data in other tabs" box and then check the box in the AOR row you want to examine. Then, the only files that will appear in the Level 1 and/or 2 tabs will be those files corresponding to that AOR.
Do you have too many rows? Further restrict the search by imposing additional filtering; see below!


